
Turtle With Shell Craft

This turtle with shell craft is one of my favorite crafts from my kindergarten teaching days! I have been waiting to do this craft with the Captain, and figured he was old enough and had enough attention span to complete it, and I was right. He loved it! I let D make a Turtle, too, but he did have to have a lot more assistance, of course. This cute craft can go along with many lessons and there can be many variations, depending on the turtle you would like to make or the skill you would like your kids to practice.
Materials needed for one turtle:
- disposable sturdy paper bowl (like these)
- tissue paper (green, brown, blue, whatever color you want your turtle to be!)
- school glue
- water
- paintbrush
- one piece of card stock
- pencil
- scissors
- watercolors or markers
- one set of googly eyes
Directions:
1. Cut tissue paper into one inch squares. They don't have to be perfect at all, but they should be around that size.
2. Mix equal parts water and glue in a bowl.
3. "Paint" the bottom of the bowl with the watered down glue mixture. I had the boys start with the very bottom first, then the next step, then back to the sides. You definitely don't want glue on the entire bottom, because it will dry before you can get to the next step.
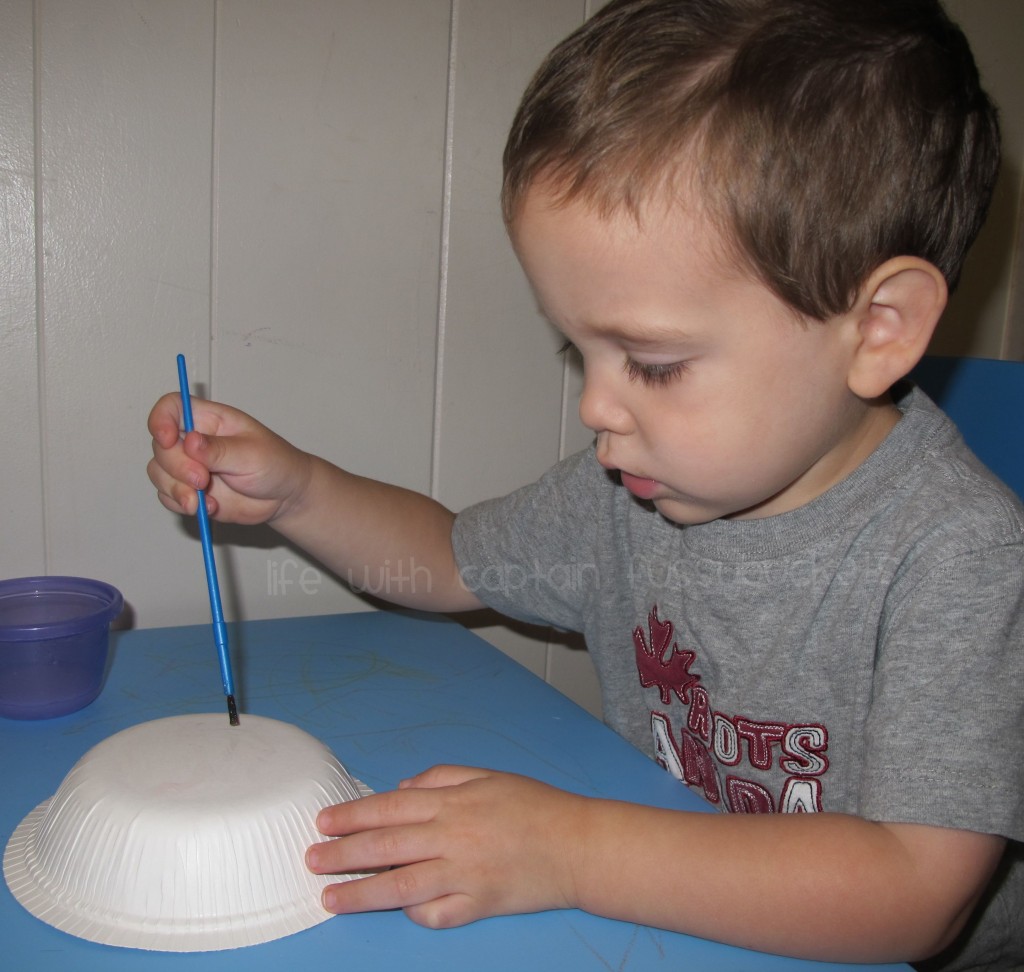
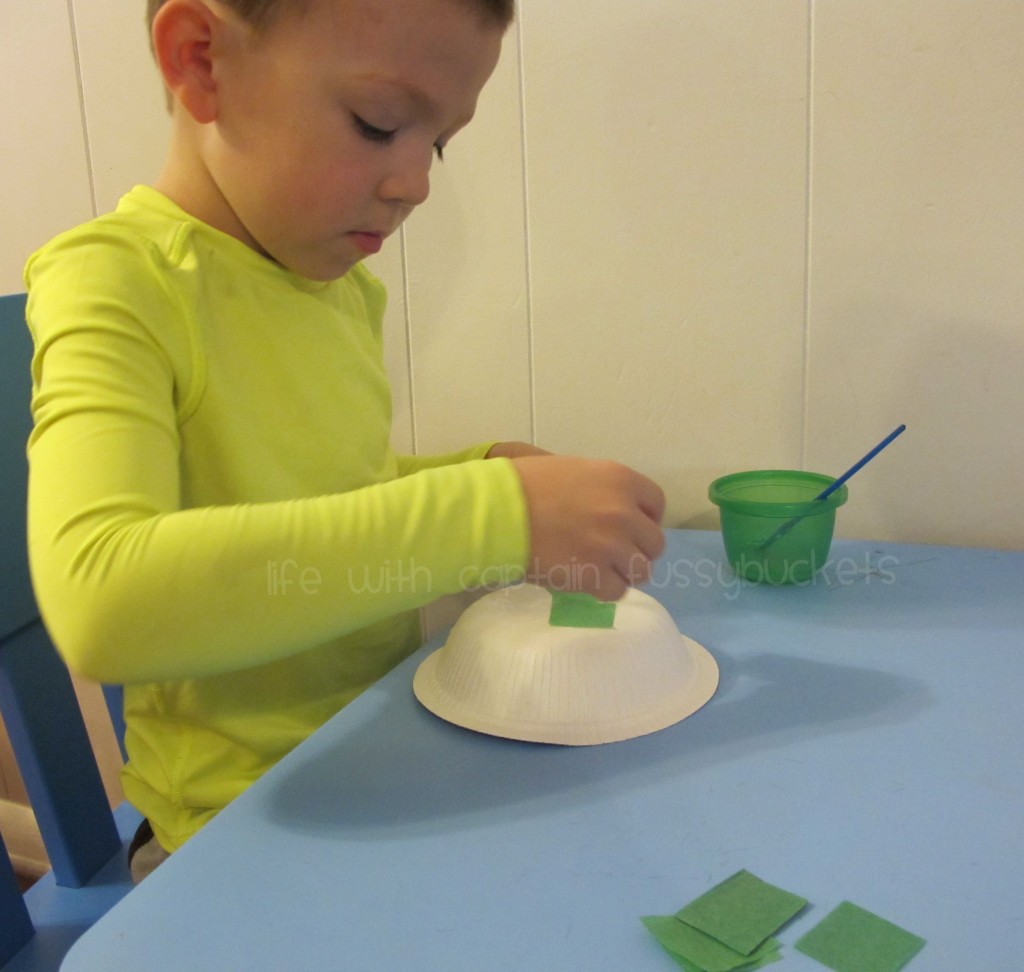
4. Next, start sticking on your tissue paper squares. As you stick, use the glue solution to paint over the tissue paper to make the whole thing flat. Continue with this until the entire bottom part of the bowl is covered. I told the boys to make sure no white spots are showing through. You can make patterns or make it all green, it's up to you!
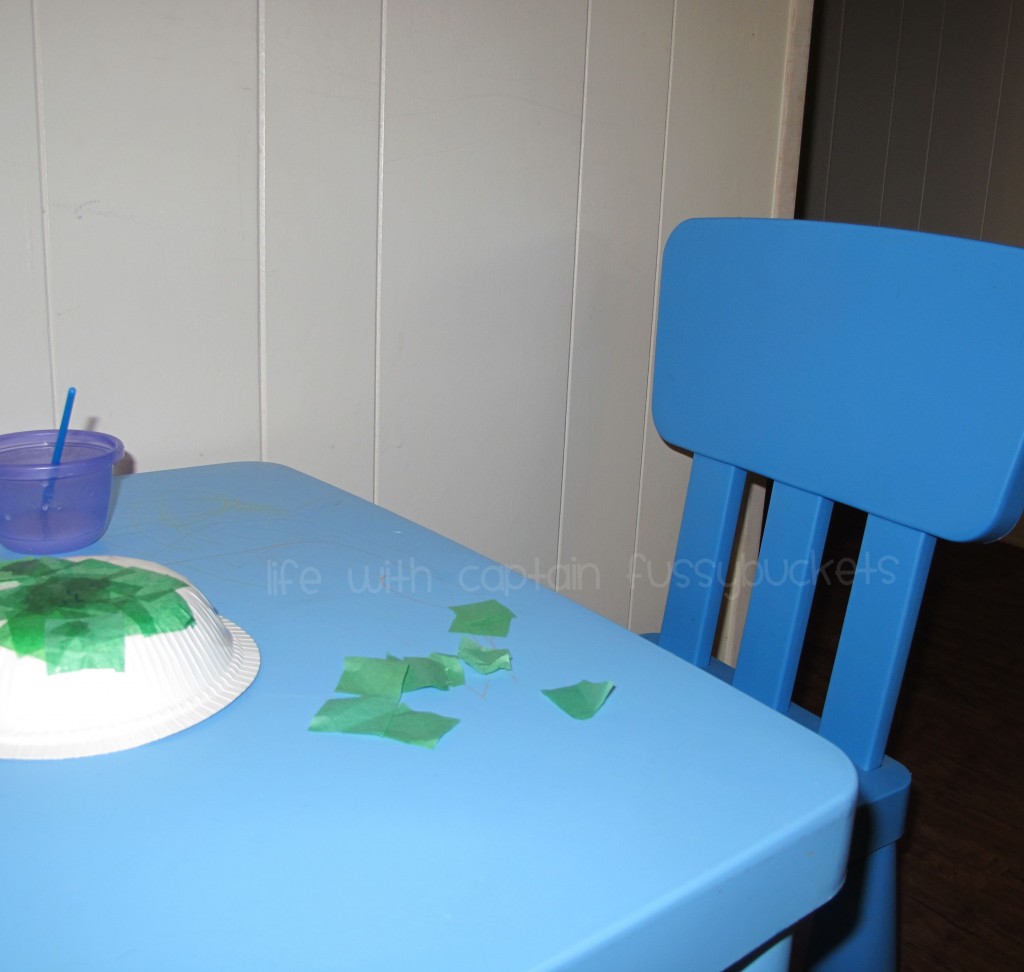
This craft can be done over time. Notice how much D complete before he was "done:"
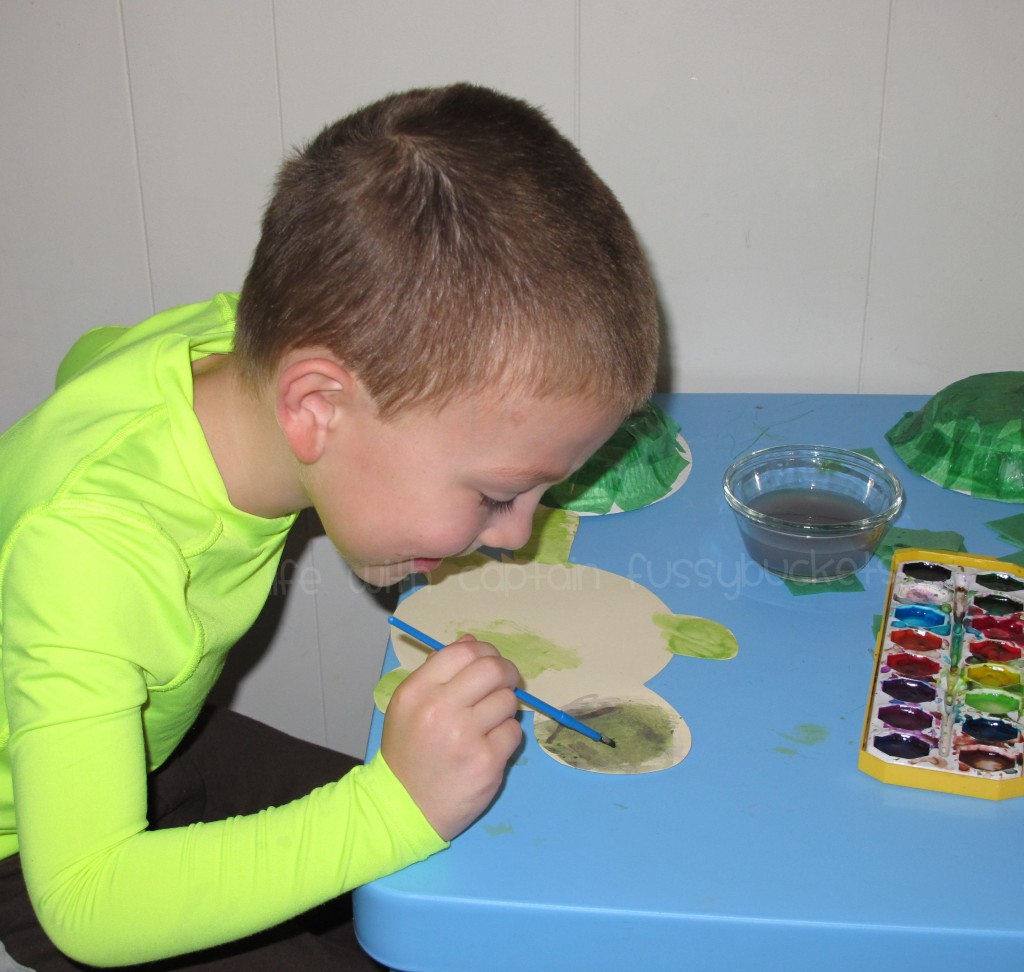
5. When the entire "shell" is covered with tissue paper, set it aside to dry. Grab your card stock, pencil, and a spare bowl, as well as your creativity. It's time to draw the head, legs, and tail. You could even let your kids do this part. Just put the bowl in the middle of the page, trace around it with the pencil, and then free hand the body parts. I'm not a free hand artist, but this part wasn't too difficult. OR you could let your child do it themselves, but the Captain didn't really want to do it by himself. Just make sure that you have traced around the bowl, because you'll be gluing the bowl to the paper later on.
6. Cut out the tracing and paint the turtle head, legs, and tail with water colors or color with markers or crayons.
In my experience, you give a kid something with a head on it to color, and they want to draw eyes and a smile, just like humans. So, that is why the Captain's turtle is standing up in the finished picture. It does not have to be, but that's how he wanted it. Clearly real turtles don't walk on two feet and have a big smile...and the mouth is actually on the underside of your head but whatever, it's your turtle, do what you want to with it!
7. After the body is dry, squeeze a ring of glue around the outside of the bowl tracing on the turtle body and stick the turtle shell on. Then, glue on two googly eyes, let dry, and your turtle is complete!
What a super cute craft idea. I think this is something we can do at home with the supplies we have in the craft cabinet. Thanks for sharing.
Thanks! It was really fun!
Such a great idea! My neice would love this craft!
So cute!! That would be fun to do with the kids!