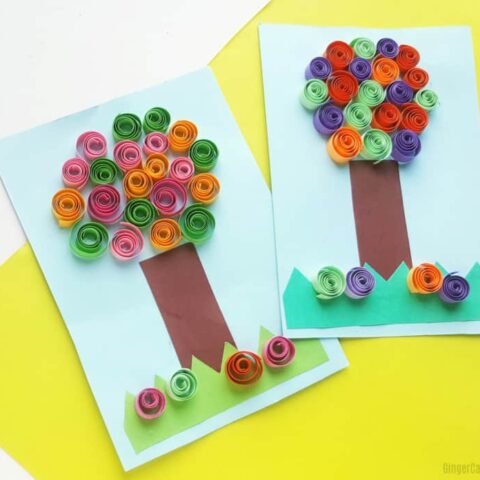
Quilled Tree Craft For Kids
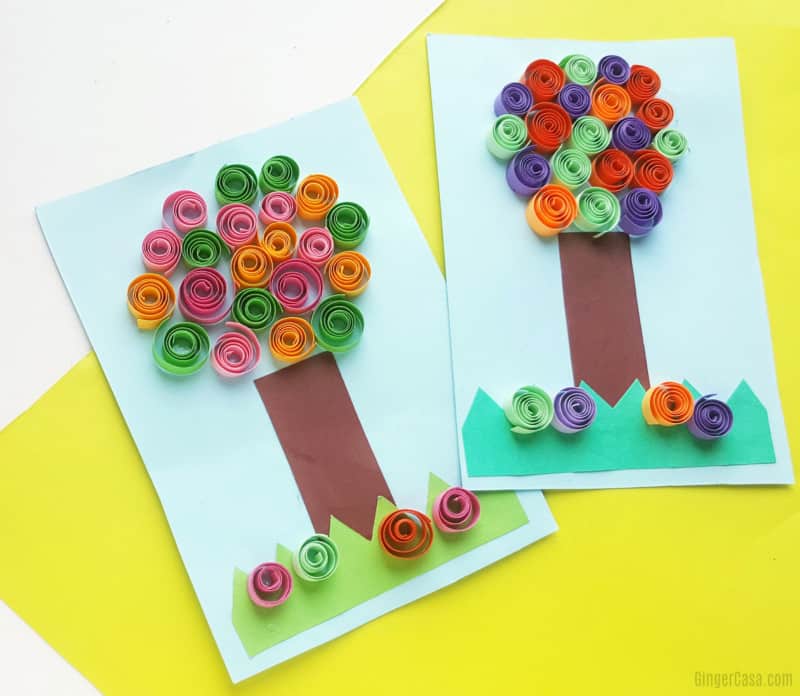
As you can tell by my logo, trees are one of my favorite things! The boys and I always talk about the different colors in the trees in all the seasons...they are all so beautiful aren't they? This quilled tree craft is perfect for long summer days and kids who love crafts!
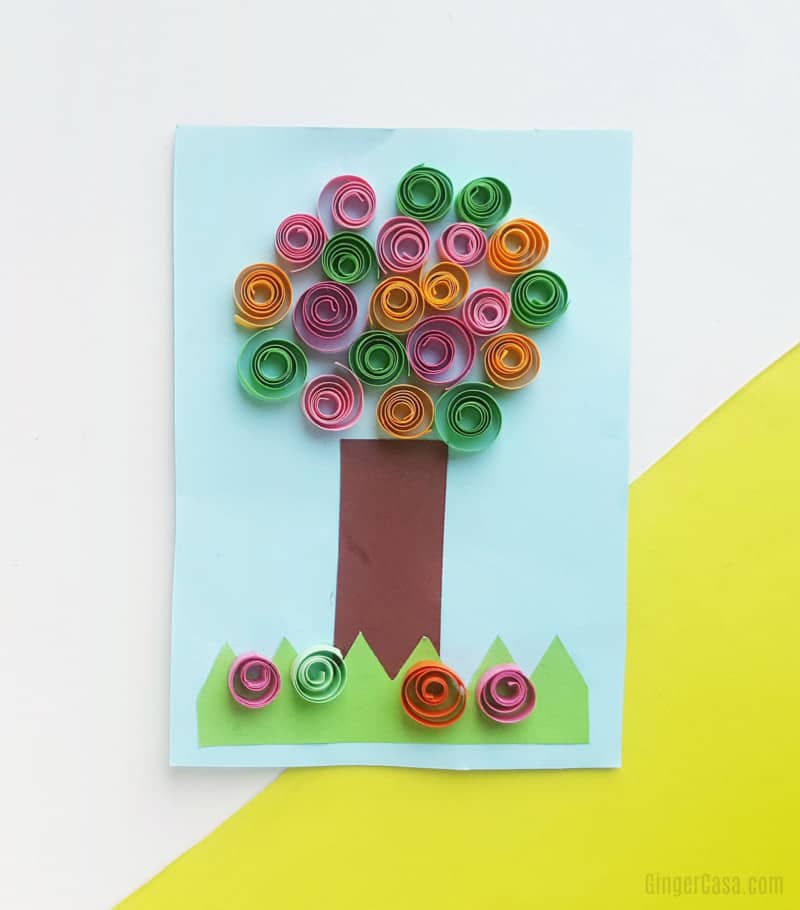
This is a pretty simple craft for kids, but you will need to supervise the little ones who may not have the fine motor skills yet. All you need is a quilling tool, quilling paper or some cut pieces of paper, and some colored paper to glue these quilled "leaves" on!
The quilling process is pretty fun and relaxing! Kids just love making these little swirled pieces of paper!
This would be a great spring craft, or you could make a fall apple tree post, or fall leaves tree, all depending on what colors you choose!
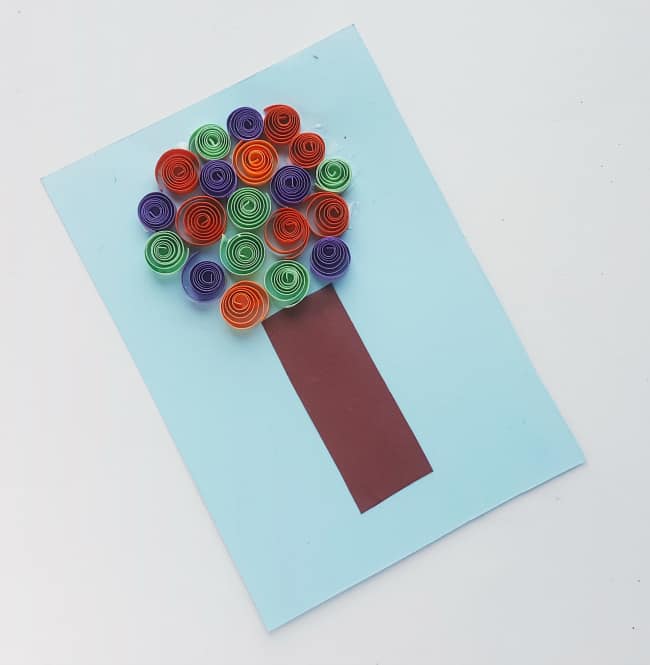
Quilled Tree Craft For Kids
This quilled tree craft for kids makes a beautiful piece of art! Great for teaching about trees and seasons and more!
Materials
- colored quilling paper strips
- colored craft paper
- craft glue
Tools
- slotted quilling tool
- scissors
Instructions
- Prepare a piece of paper for the background (canvas) Pictured is a 6 x 4 inch sky blue colored paper.
- Cut out a rectangular shape from brown colored craft paper. This will be the trunk of the tree. The size of the trunk (rectangular shape) pictured is 3 x 1.5 inches.

- Glue the brown cut out paper on the sky blue paper.
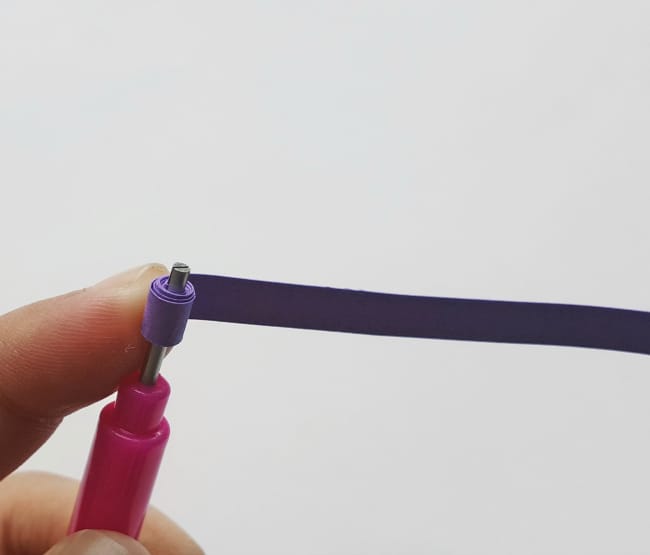
- Select at least 3 different colored quilling strips. Take a quilling strip and insert any one of its open end into the slot of the slotted quilling tool.
- Coil the strip nice and carefully. Coil the entire strip.

- Once you’re done coiling the strip take it out of the slotted tool carefully.
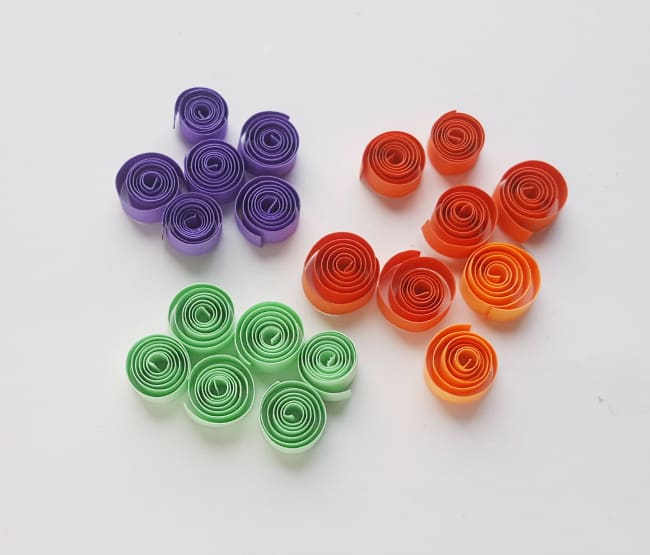
- Place the coiled strip on a flat surface and allow the coil to loosen up a bit. Repeat the quilling process for about 25 pieces.
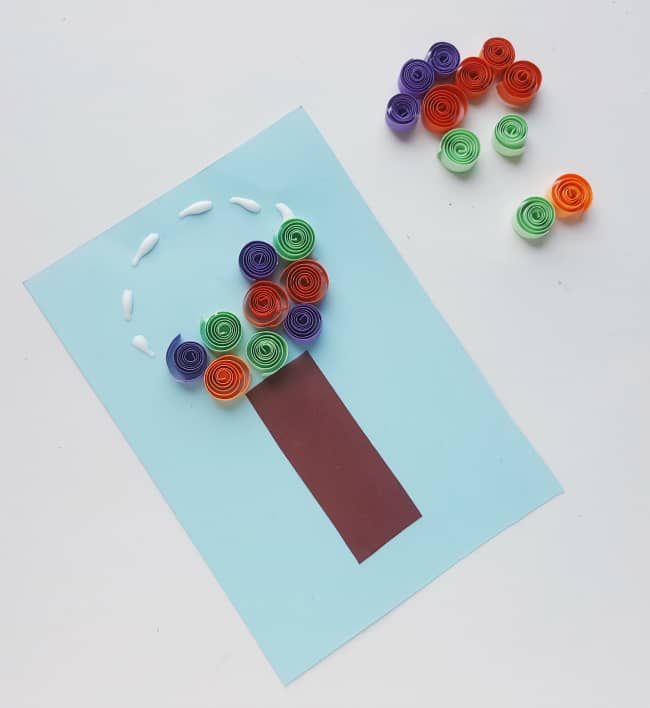
- Take the paper prepared in step 2. Apply glue above the brown trunk pattern, on places where you want to add the loose coils.
- Take the coils one by one and place them on the glued area nicely. You can apply glue to trace the outer edge of the tree pattern; this will make it easier to create the tree pattern. Continue to glue the coils until the tree pattern is complete or until you’re satisfied with the pattern.
- Take a green colored craft paper (4 x 2 inches) and cut a zigzag border on any one side of its length. Attach the zigzag green pattern at the bottom side of the sky blue canvas, covering a small area of the brown colored trunk.
- Attach 4 or more loose coils on the green zigzag edged pattern and add any finishing touches.
Recommended Products
As an Amazon Associate and member of other affiliate programs, I earn from qualifying purchases.